How To Rig and Prepare a Trotline for Crabbing
What is Trotline Crabbing?
Very generally, this is a technique for catching crabs that uses a long line that is placed on the floor of the water with baited “snoods” along increments of the line. Snoods are just the crabber’s term for a short noose-like contraption with bait attached at the end of it. The basic idea is that the line is run from a boat and setup like so:
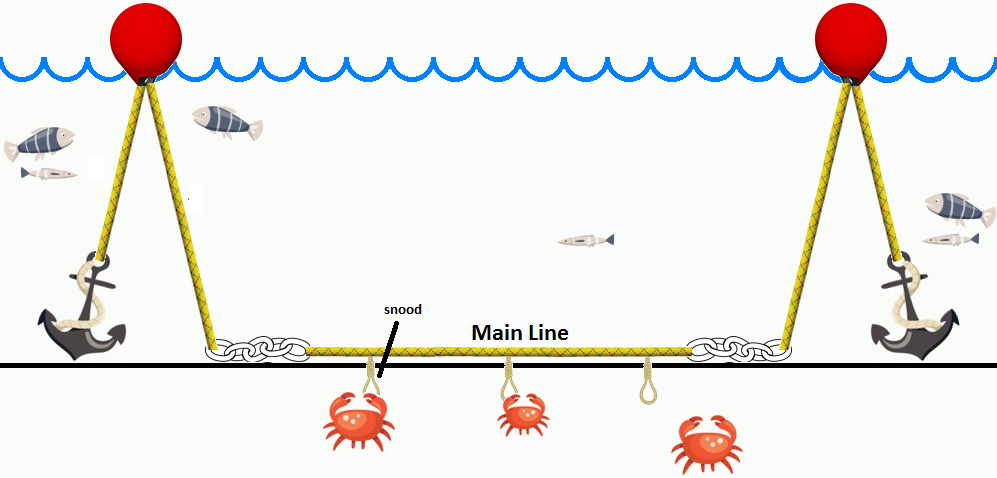
Unsuspecting crabs.
Once the trotline rig (including anchors, buoys, and chains) is set, the crabs will mosey over to the bait, cling on, and start chowing down. After sufficient time has passed, the crabber uses the boat and a PVC roller/prop stick mechanism on the boat to pick up the line. As the boat moves along the line, the crabs will be lifted from the bottom to the surface where they can be netted with a dip net one by one. This is a great way to catch a whole mess of crab in a short amount of time.
The rest of this article will go through in detail how to rig the main line of the trotline along with the snoods, and connecting the anchors, buoys, and chains together with the main line. No previous knowledge is required.
What You Will Need:
- 500-1200 ft of main line
- 4 sections of connection line
- 2 anchors
- 2 buoys
- 2 sets of 2-3 feet galvanized chain links
- 8 (or 6 or 4) brass snap swivels
- 100-250 ft (max) of bungee/shock cord for snood fabrication
- 60-150 ft (max) of fuel line hose also for snood fabrication
- A good amount of patience and build time 🙂
Check out some materials for your trotline at the CrabbingHq Store.
The Main Line
The main trotline for recreational crabbers will range from short (500 ft) to long (1200 ft). The line should be between 1/8- to 3/8-inches in diameter and can be made of nylon, or polyester (or any strong material that does not float.) It is important that the line does not float so your bait can be easily reached by unsuspecting crabs. Loktite #4-5 5/32 inch (4mm) 1200 feet rope is recommended.
A Single Snood (takes less than 30 seconds to make)
To make a single snood you will need a couple of things:
- 10 inches of 5/32 inch bungee or shock cord
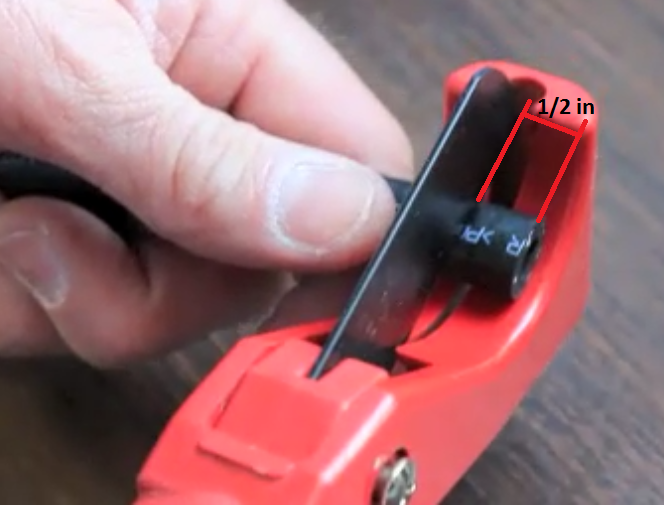
- ¼ inch fuel line hose cut in ½ inches
When you are buying the materials to assemble your trotline, you will probably buy a spool of bungee/shock cord and some length of fuel line hose. So imagine you need 100 snoods. That equates to roughly 84 feet of bungee cord and about 50 inches of fuel line. Round up when buying so that you have some buffer.
You can procure these materials from your local hardware store. They will look like this:

You want to assemble these two things to basically look like this:

The reason for using the bungee/shock cord is that they will dampen the vibration from the PVC roller/prop stick. This will make it less likely for the crabs to be spooked and will increase the chances of them holding on.
Step 1:
Take your 10 inch shock cord and singe the ends with a lighter so that the ends don’t unravel. Tie two half-hitch knots at both ends. If you don’t know what a half-hitch knot is, fear “knot”. It’s basically the first knot everybody knows how to tie when tying shoes. See the below video.
Once that is done, you should have a 10 inch shock cord with two bulging knots at each end.
Step 2:
Bend the cord together so you are holding the two ends. Pass the closed, bent end of the cord (end without the knots) through the fuel line hose and viola, you have a single snood.
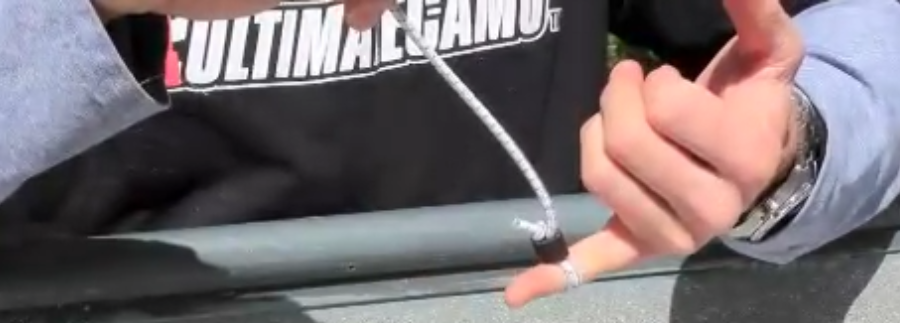
R.I.P pinky finger
Your bait will be held in the loop on the snood and as long as the fuel hose holds the cord snuggly enough, your bait will not fall loose. Notice that the loop is adjustable in size as well.
Attaching Multiple Snoods to the Main Line
Spacing the snoods on the main line should be anywhere from 4 to 6 feet. This method of attaching the snood to the main line is mainly for lighter lines that can be tied easily.
Step 1:
Make a loose slip knot with the main line where you want the snood to be placed. Learn how to make a slip knot with the following video.
The video uses an open tag end but you can make a slip knot the same way in the middle of the main line. Don’t tighten the slip knot just yet.
Step 2:
Pass the end of the snood that doesn’t have the loop into the slip knot loop. Using the tag end of the snood, tie a simple half-hitch to attach to the slip knot loop. Fasten it snug and tight.
Step 3:
Pull on the two ends of the slip knot (main line) to tighten the slip knot and bam! You are finished attaching one snood to your main trot line.
Now that you’ve mastered rigging a single snood to your main line, you only have about 99-199 more to go. Teach your kids and have them work for you. That’s always a good strategy and it builds character. On to rigging the anchor/ buoy/chain system.
Rigging the Anchor/Buoy/Chain System
You will need two groups of anchor-buoy-chain systems, one at each end of your main line for the trot line to function properly. Now, knowledge of the depth of the water you will be crabbing in is important. This dictates the length of the line from the anchor to the buoy (let’s call this length “X”) and length of the line from the buoy to the chains (also length “X”). You just need to have length “X” greater than the depth of the water maybe 20-25%. If length “X” is shorter than the depth of the water, your buoy will not be at the surface of the water and you will not be able to find your trot line.
Step 1:
Buy your materials. The anchor can be a mushroom anchor or if you are unconventional, you can use an old car brake drum if you have that lying around. The line connecting the chains and anchor to the buoy does not have to be the same material as your main line. Poly rope should be sufficient. For the chains, you want to buy about 2-3 feet of heavy, galvanized chain links. It is important that the chains are galvanized to resist the corrosion of the water. Of course, proper cleaning and storage of your supplies will ultimately determine the life but that’s another story. You want to buy 8 total brass snap swivels to facilitate attachment between the anchors, buoys, and chains. They need to be big enough to hook into the various items. Note that you don’t really need 8 snap swivels. You just need enough so that you don’t have to attach everything by knots and for simple disassembly and storage. Plan this for yourself.
Step 2:
Measure out four sections of line of equal and predetermined length. Attach your snap swivels to your four sections with your favorite knotting technique. Now you should have four sections of line with 2 snap swivels secured at each end. Let’s call these connection lines.

Ooo. Shiny.
Step 3:
Assemble the entire trotline. You can bring your main line in now with all your snoods. Connect the main line ends to the chains. Take 1 anchor and snap on a connection line. Take the end of that connection line and snap it to the buoy. Take another connection line and snap one end to the buoy. Take the end of that connection and snap it onto one end of the chain. Repeat for the other anchor/buoy/chain system.
Conclusion
And there you have it. Your very own trotline rigged up and ready to go. Hopefully this article has helped you in some way and maybe opened your world up to a new and fun way of catching those delicious crabs. Check out our store for some materials to help you out. Check out the trotline in action from some YouTubers!